(Photo"0")
Highly Recommended Fan Modification
updated 10 October'97
Click here to read the notice about head
life issues.
COOL AND CLEAN
The Tascam/Sony digital eight track deck has fan cooling. The fan draws cool air into the machine across the electronics, which is good, but it can also suck dust in through the mechanism's tape-access "port" which can accelerate clutch and head failure. Photo"0" shows dust that has collected on one of the two switches that detects the tape cassette's status ( record / safe, tape formulation and thickness, etc). The two switches are located on far left left and far right just at the entrance of the mechanism.
The modification consists of reversing the fan's direction (a purely mechanical task) and installing an external filter. The proceedure is detailed below, but if you are squemish, routine maintenance should include vacuuming the tape entrance port at regular intervals (weekly or monthly). Use the high-velocity nozzle attachment (that long, flat thing with the rectangular opening) and place the nozzle just beyond the protective flap of the loading door and slide from side to side.
An even better method is to first remove the transport (four medium
phillips screws), then separate the black plastic loading mechanism (four
small phillips screws) and "assist" the vacuuming process by dusting with
a half-inch artist's brush. (This proceedure will be detailed at a later
date). There a lots of places inside the chassis where dust and hair-balls
collect...
(Photo"0")
In order to bring cleaner air into the machine it must first be filtered. The filter is available from Digi-Key 800-digi-key. Their part number is CR214-ND. If you like parts like I like parts, be sure to have a catalog on hand because there is a minimum.
BEFORE adding a filter, the airflow direction must also be changed.
To do so, unplug the machine. Remove the three screws on each side of the
cover as well as the single screw on the cover's top/rear/middle. There
is a black plastic extension rod that links the front panel power button
with the switch in the rear.
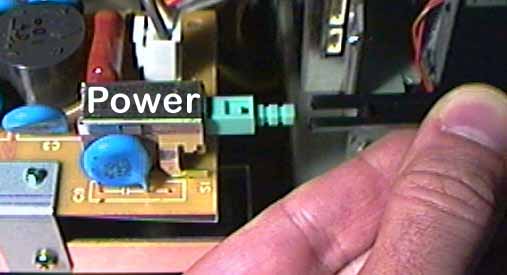 (
Photo 1 )
Gently pull the power button extension away from the switch until it
pops off (Photo1).
Then, remove the two screws that secure the power switch subassembly
to the chassis (Photo2).
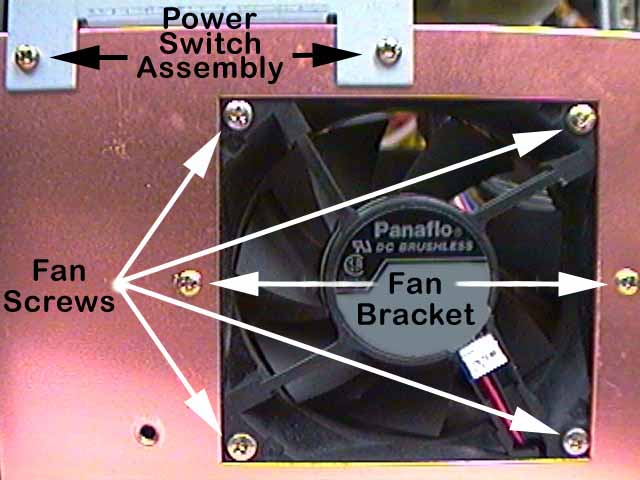 ( Photo 2 indicates
all screw locations. )
There are four screws that secure the fan to a metal frame which itself
has two screws. After all six screws have been removed, extract the fan,
disconnect its power cable ( See Photo 3) and vacuum the dust that has
collected on the blades. Flip the fan's direction, reconnect and remount
with the power connection on the "inside."
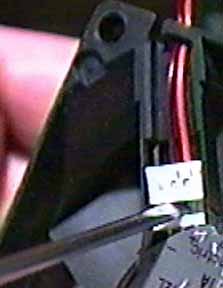 ( Photo 3 )
Mount the air filter to the machine's cover using pan head (the type
that countersink) #6 screws ( Photo 4 ).
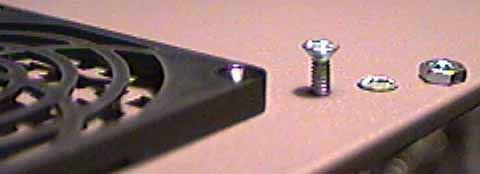 ( Photo 4 )
For extra safety, paint the threads with nail polish so that the nuts
don't come loose and get sucked into the power supply ( Photo 5 ).
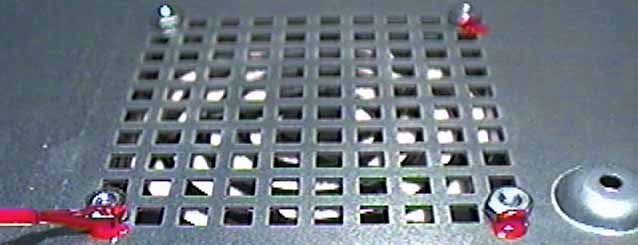 ( Photo 5 )
Be sure to clean and/or replace the filter from time to time.
I love feedback in the form of email.