If
I Knew You Were Coming I’d Have Baked A Tape!
A Recipe for Tape Restoration
copyright 1998 by Eddie Ciletti
updated 2022 and 2023 as indicated
UPDATE 2022
The baking times for all tapes has increased since this article was first published, in 1998. For example, the bake time for 2-inch tape THEN was 6 to 8 hours. As of 2022, 2-inch Ampex 456 can take up to three days to bake at 130F / 55C.
We all know that splicing tape degrades over time, and for that alone, tapes should be played only – and never fast wound. Another reason to exclusively play tapes (rather than fast wind) is that there have been increased reports of the oxide peeling away from the plastic (mylar / polyester) and adhering to the black carbon back-coating.
With all this in mind, consider the following:
Inspect the tape pack, if uneven, bake at 120F ~ 125F for at least a day to make the tape playable enough to get a good, even tape pack (wind). Make not of the speed and direction during this process.
If / once the tape pack is good, bake at 130F for 24 hours.
Once the tape has cooled, cut cloth or paper towel the width of the tape and thread acroos the entire tape path except the erase head. Secure at one end with painters tape.
Place the reel on the machine, start the capture process and roll tape. It doesnt matter if the tape was stored head or tails. If it plays in reverse, simply use the workstation's REVERSE tool.
You will know right away if the tape hasn't baked long enough, either the play head will clog or you will see shedding on the deck plate (or at the cleaning cloth's edges.
There are many nuances and tricks to getting through this process, but the best advice is to simply take your time.
UPDATE 2023
|
|
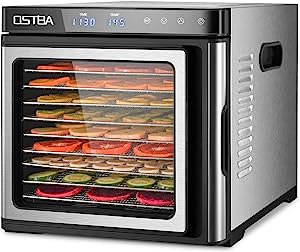
EASY BAKE When this article
first appeared in EQ Magazine in 1998, I chose a standard food
dehydrator because it was much more affordable than a
convection oven. |
CLEAN TAPE
Most of the time I cut a piece of twill-style cloth into strips the width of the tape, secure behind the head stack with painters tape and drap across all but the playback head. The cloth cleans the tape and prevents shed from clogging the heads during xfer. It may also reveal that baking wasn't effective enough and that more baking is required.
Baking
tape on large hub reels is fairly straightforward, but on 7-inch
reels or smaller, you may want to bake at 120F, for at least 24
hours so that the tape is “playable enough” to get a
good tape wind. Play across the cloth – if possible - adding
ample leader at both ends to act as a "pad."
NOTE:
Tape that has been poorly threaded at the hub will leave a
once-around bump that will be baked into the tape if not
corrected.
At all times you must pay attention while playing tape to make sure the oxide is not flaking off or sticking to the back coating.
After adding pad to the head and tail, and getting a smooth wind - the tape can be baked at full temp and then transferred.
~~~~~~~~~~~~~~~~~~~~~
The aging of magnetic tape concerns everyone. Even as you read this, a DAT tape is waiting to clog the heads of your most difficult-to-clean-machine. Unlike my usual visits to the digital domain, this is a detour into the magnetic past! Are you ready to explore the time-space continuum?
TIME TRAVELING… PLEASE WAIT!
People who make analog recording part of their daily routine take for granted that the tape is new and the machine is operable. When called upon to re-master or remix a vintage analog recording, it goes without saying that the machine must be in top form AND that your business should be insured. That said, there is one variable for which you have no control: tape condition. This is especially true for mid-seventies era high-output tapes such as AMPEX 406/407 and 456, 3M 250, and AGFA 468. It does not exclude those made well into the eighties.
Don’t attempt to play a "vintage" tape before reading this article! In order to expect full recovery, tapes that have been shelved for an extended period deserve special treatment just like a scuba diver must slowly return to the surface.
GOO "U"
All tape consists of three primary components: iron oxide, the "binder" or glue and a plastic carrier. Acetate — which does not stretch and can be brittle — was used until the sixties. Though its oxide color is typically reddish-brown, black oxides were also used.
Mylar/Polyester eventually replaced Acetate. It handles stress well and never becomes brittle. Sixties-era Mylar tapes with black oxide will be the least problematic.

Figure One shows how easy it is to identify Acetate
simply by holding it up to light. (Acetate is translucent and
Polyester is opaque.)
Tapes that have been poorly stored -
like the photo "uneven wind" above - will require extra
care.
UNGLUED
Over time, the glue that binds the oxide to the plastic will absorb moisture and "break down." The symptoms of "binder breakdown" are immediately obvious even when rewinding. Tearing sounds and sluggish behavior are clues to quit before the oxide comes off. Machines with stationary lifters (Ampex 440/1200, MCI and 3M) will, in many cases, stall well before reaching the halfway point. An older Studer, with its rotating guides, may not reveal any warning signs until the tape is played.
Playing a bad tape is not recommended. Just trying to get through a three-minute pop song will require several cleanings. Once the precious sonic material collects on transport parts it is worthless, not to mention difficult to remove. Do you really want to risk damage to the master for the sake of getting a transfer? There is hope, so be patient.
|
Snackmaster FD-50 |
SHAKE ‘n BAKE: Part I Several years ago it was discovered that baking tape at low temperature reactivated the binder making tapes playable as new. While convection ovens and hair dryers have been called into service, the most elegant and affordable solution came from my brother-in-law Gary, a metallurgist in St. Paul, Minnesota. The device de jour is the Snackmaster Pro model FD-50 made by American Harvest (800-288-4545). At $85, with shipping, it comes standard with four trays, each of which can comfortably handle a reel of half-inch tape. (Additional trays and jerky mixes can be ordered. Allow four weeks for delivery.) To accommodate one- and two-inch tapes, modify one tray by cutting out the plastic spokes along the perimeter with a wire cutter. This creates a "dummy tray" adding height to the tray below. Figure Two shows the dehydrator as intended, with standard and modified trays overhead. Do not process food and tapes together! The FD-50 features an adjustable thermostat and a built-in fan to circulate the air. I checked for dangerous magnetic fields and found none, though I do use the upper trays just to be safe (the fan is in the bottom of the unit). The heat is adjustable from 95° F to 145° F and is accurate within five degrees when checked with a photographic thermometer. |

STORAGE and HANDLING TIPS Storing tapes "tail-out" after having been played minimizes the effects of "print-through" and improves the chances of long-term survival. "Print-through" is a form of mechanically induced tape echo. The winning combination of high record levels and fast winding will transfer signals from one layer of tape to another. Tail-out storage will hide print-through as "post echo."
If you discover that the tape is unplayable while in fast wind, come to a slow stop. Fast winding the tape may cause further damage because oxide may adhere to the back of the previous layer. In addition, old splices may come apart. For the safest journey to the head, play the tape backwards first, then forward to create an even pack.
The best machines for winding traumatized tapes are those with ALL rotating guides. The AMPEX ATR-100 and most Studer machines are well suited to the task. In addition, you will want to remove the head assembly otherwise a gooey oxide / binder cocktail will quickly collect on all stationary surfaces (heads, lifters and guides). Model 800 series Studer machines are dangerously powerful so don’t use the remote, pay close attention and be ready to stop at a moment’s notice.
If uncertain of the tape’s condition but the pack is good, bake it anyway. Do not bake Acetate!!!
RESTORATION
When baked, the tape will expand and become loose around the hub. For this reason, use flanges to protect the tape from coming apart. Cooking temperature is between 130°F and 140°F. Tapes wound on plastic reels with small hubs should be rewound onto large reels with NAB hubs. Be careful to thread the tape around the hub without any "folds." The goal is to minimize "mechanical distortions" that can be impressed upon subsequent layers causing dropouts. The "wind" must be smooth as if played!!!
I have received several e-mails regarding "cooking time" and temperature. Provided the wind is smooth, I am not afraid to bake a quarter inch tape at 135°F — for two hours — flipping every half-hour. You will find that cooking time varies with tape width, type, brand, condition and the number of reels being baked. Ampex tape from the seventies might require twice as much time as 3M tape from the eighties (as reported by Wendy Carlos when restoring her masters from that time period). Table One below can be used as a guide.
|
Tape Width |
Baking Time varies with temperature and condition |
Comments (applies to all) |
|
1/4" |
1 hour to 4 hours |
Position near top cover and flip every half-hour |
|
1/2" |
2 hours to 5 hours |
Assuming "tail-wind," play backwards after wrapping cloth over heads. |
|
1" |
3 hours to 6 hours |
Check for splices and shed |
|
2" |
4 hours to 8 hours |
Bake 1/2 hour
for each 1/4-inch, |
Table One: Recommended baking temperature is 130°F
If you are conservative about time and temperature and the tape still sheds after baking, put it back in! Being conservative for the sake of not losing high frequencies is a bit silly. Shedding during a transfer can be annoying at best and a pain-in-the-ass if you don't discover the flaw until way after the time of transfer. If you are concerned, consider baking a tone reel or test tape for evaluation purposes. Test tapes are not immune to shedding. Based on my experience, tapes can be baked more than once. Afterwards, return the tape to its box, allowing it cool for the same amount of time it was baked as a precautionary measure. Not all machines are equally gentle, a warm tape is more likely to stretch than one at "normal" temperature.
To confirm the process, I sandwich a piece of cloth around the tape while rewinding. Figure Three shows what happens when the tape is not baked. A minimal amount of oxide shed is normal. Excess shed will cause friction to build up within the cloth. If so, re-bake.

Figure Three:
An unbaked tape leaves a trail
POST RESTORATION STORAGE
I recommend wrapping the tape in a plastic bag and including a Silica Gel pack to absorb moisture.
E-mail Eddie
|
|
Worn heads will aggravate the process of getting a good transfer. Figure Four features multiple views of a two-track head. Lighting anomalies conveniently darkened the wear pattern of the "worn head," which appears as a horizontal bar in the center. From the side-view, arrows point to where oxide gets trapped in the grooves worn by the tape. Use a toothpick or business card to remove stubborn dirt. Figure Four shows three views of a two-track quarter-inch head stack Worn heads like this one should be re-lapped to improve high-frequency response and reduce low-frequency muddiness. To prevent a future groove from trapping dirt and degrading performance, relief slots can be cut into the surface (See the top image of Figure Four). Looking for more on Tape Machine Maintenance?
|

NOTES:
Baking uneven tape will damage the edges because they get too hot and then you'll have permanent artifacts in the stereo image.
Baking at low temps - like 120 - 125 degrees - over longer periods of time, will "fix" the tape enough so it can be properly wound. Baking tail out is both for a good "play wind" as well as for print through, same as "good" tape. Re-bake at a higher temp to fully reactivate the adhesive.
Tape on small reels will have ANY mechanical anomaly "ironed" into the tape, which is understandably bad - so again, a "light" baking enough to allow the tape to be transferred, preferably tail out - is the way to go. I use extra leader or buffer tape to get the important material away from the hub, even for an NAB reel.
I hope this helps. Of course, you are welcome to contribute to my "research fund," (paypal to edaudio@tangible-technology.com).
DESSERT EYE-LAND
The Dehydrator is perfect for tapes, bananas and sun-dried tomatoes. The addition of this culinary tool to your studio gear will surely generate restoration business as well as improve client health by upgrading the quality of their junk food. Enjoy!
Eddie has a library of tapes to restore from his days as Italian heavy-mental crooner, "Fred Zeppole."
He is currently restoring tapes from 1976 to 1980.
I
love feedback in the form of email.
Go back to the tape directory?
Go back to the main directory?